November 9, 2026 • Rebecca Dean, Fun Factory Sensory Gym
How Do I Design a Sensory Room?
Designing a sensory room starts with who will use it. Here are the 7 steps our team follows on every install, from layout and safety to equipment.
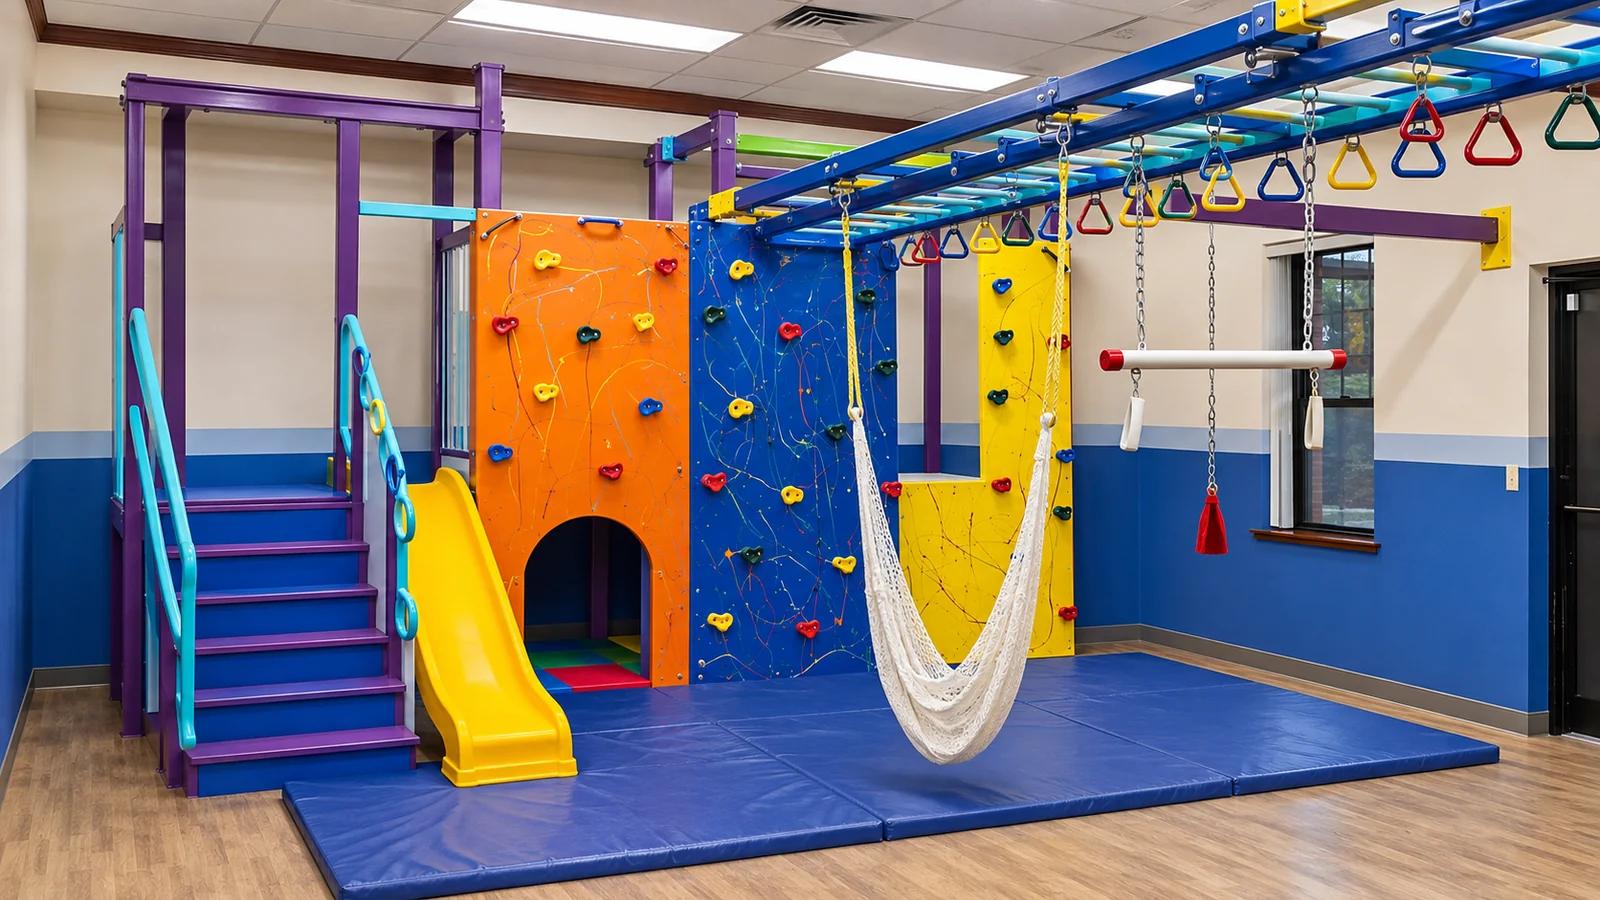
Designing a sensory room starts with the person who will use it. Figure out what kind of sensory input they seek or avoid, measure the space and its ceiling structure, and split the room into an active zone and a calming zone. Plan the mounting and safety before choosing any equipment, then finish with lighting, color and storage that keep the room from feeling overwhelming. Everything else you buy or build follows from those decisions.
Our team has designed and installed more than 4,000 sensory gyms and sensory rooms over 26 years, in homes, therapy clinics, schools, hospitals and churches. The steps below are the same ones we follow on every project, whether the room is an 8' x 10' spare bedroom or a full clinic floor.
The 7 steps at a glance
- Define who the room is for and what it needs to do
- Measure the space, including ceiling height and structure
- Lay out an active zone and a calming zone
- Plan safety and mounting before equipment
- Choose equipment by the type of sensory input it gives
- Set the lighting, color and sound
- Build in storage and room to change
Step 1: Who is the sensory room for?
Every effective sensory room is built around a specific person or group, so the first question we ask in a consultation is who will use the room and what they need from it. A child who seeks input, the one who climbs everything and spins without getting dizzy, needs movement, resistance and somewhere safe to crash. A child who avoids input, who covers their ears or melts down in busy rooms, needs a space that lowers stimulation and gives them a place to retreat. Many children need both depending on the day, which is why most of the rooms we build include a little of each.
Write down your goals before you think about equipment. For a home sensory room, a goal might be helping your child regulate before school or giving them a place to decompress after therapy. For an OT sensory room in a clinic, the goals usually come from treatment plans, so the room has to support the specific activities therapists run with patients every day.
If your child already works with an occupational therapist, bring them into the design early. Their read on your child's sensory profile tells us which equipment will actually get used, and we regularly build layouts around a therapist's recommendations.
Step 2: How much space do I need for a sensory room?
Less than most people expect. We've designed sensory gyms in spaces as small as 8' x 10', and a focused room with a swing, a crash pad and a calm corner can do a lot in that footprint. What matters more than square footage is what's above you, because the ceiling height and the structure behind the ceiling decide which suspended equipment the room can safely hold.
When you measure, record the length and width of the room, the ceiling height at its lowest point, and where the doors, windows, outlets, vents and any support posts sit. Note whether the ceiling is finished drywall, a drop ceiling or open joists, since that changes how swings and zip lines get mounted. A basement with exposed joists is often easier to work with than a finished bedroom for exactly this reason.
You don't need a formal floor plan before creating a sensory room with us. A rough sketch, a printed layout or a few photos of the room give our designers enough to draft a first layout.
Step 3: How should I lay out a sensory room?
Divide the room into an active zone and a calming zone, and keep them far enough apart that one doesn't spill into the other. The active zone holds the equipment that gives strong movement and pressure input, such as swings, climbing walls, monkey bars and crash pads. The calming zone is quieter and lower to the ground, usually a corner or nook with soft seating, a tunnel or seclusion space and dimmer light where a child can retreat when they've had enough.
Flow matters as much as the zones themselves. A child coming off a swing should land in open space and move toward the crash pad or the calm corner without crossing the path of another swing. In clinics we also plan around therapist workflow, so a therapist can move a child between stations quickly and see the whole room from wherever they're standing. The same idea applies at home, where you want to see your child from the doorway without walking in.
Leave more open floor than feels necessary, because empty space is part of the design. It gives kids room to move, keeps swinging equipment clear of walls and makes the room feel less crowded to a child who overwhelms easily.
Step 4: What safety features does a sensory room need?
Safety gets planned before equipment, since the mounting and flooring decide what the room can hold. Every suspended piece, whether it's a swing, a trapeze or a zip line, has to be anchored into the building's structure and rated for the forces a moving child creates, which are much greater than the child's resting weight. A hook screwed into drywall is never a safe anchor for moving equipment.
Under and around anything a child can swing on or fall from, plan impact-absorbing flooring such as foam floor tiles or crash mats, and keep a clear zone so a swinging child can't reach a wall, a door or another piece of equipment. Pad any hard corners, cover outlets, and keep cords and blind strings out of reach.
This is the part of a sensory room where professional design and installation matter most. Fun Factory equipment is engineered as an integrated, weight-rated system, built by our own carpenters in Wisconsin and New Jersey and installed by certified crews, and we're insured and bonded specifically for sensory gym installations.
Step 5: What equipment should go in a sensory room?
Choose equipment by the type of sensory input it provides, starting with the input that matches the goals you set in step one.
| Sensory input | What it does | Equipment that provides it |
|---|---|---|
| Vestibular (movement and balance) | Gives the brain movement information that supports balance, coordination and regulation | Platform, pod and lycra swings, zip lines, trapeze bars |
| Proprioceptive (pressure and resistance) | Heavy work that helps a child feel where their body is, and often calms them | Climbing walls, monkey bars, rope ladders, crash pads |
| Tactile (touch) | Builds tolerance for different textures | Ball pits, sensory panels, textured mats |
| Calming and retreat | Lowers stimulation and gives a child a safe place to reset | Tunnels, seclusion areas, hammock and pod swings, soft seating |
For most rooms we suggest starting with one or two anchor pieces that serve the main goal, often a swing for a sensory seeker or a retreat space for a child who avoids input, and adding from there once you see what your child gravitates toward. Every item we install is built to fit the specific room.
Step 6: What lighting, colors and sound work best?
Bright overhead fluorescent lighting bothers many kids with sensory sensitivities, so swap it for dimmable LED fixtures or lamps you can control zone by zone. Natural light works well if you can soften it with blinds or curtains.
For color, keep the walls and large surfaces in muted tones like soft blues, greens and warm neutrals, and let the equipment carry the brighter accents. A room painted in saturated primary colors can feel energizing for a few minutes and draining after that.
Sound bounces around a room full of hard surfaces, which is why rugs, foam flooring and soft wall panels make such a difference. A small speaker for calming music or white noise also gives you control over what the room sounds like.
Step 7: How do I keep a sensory room working as needs change?
Plan storage from the start, because balls, weighted blankets and fidgets turn into clutter quickly and a cluttered room is harder to regulate in. Closed bins or cabinets along one wall keep the space calm and make cleanup part of the routine.
Then plan for change. A child's needs shift as they grow and as therapy goals move forward, and a clinic's caseload changes over time. We design our gyms so equipment can be swapped, added or reconfigured later, so the room keeps up with your child instead of being outgrown in a year.
The rooms that work best are used on a schedule, as part of a daily routine and never only as a reward or a consequence, so kids learn to go there before they hit their limit.
How is a home sensory room different from a clinic or school sensory room?
The design steps stay the same everywhere, but the priorities shift with who uses the room and how often.
| Home sensory room | Clinic or school sensory room | |
|---|---|---|
| Who uses it | One child or siblings | Many children, often back to back |
| Design input | Parents and the child's OT | Therapists, treatment plans and staff workflow |
| Supervision | A parent's sightline from the doorway | Clear sightlines across the whole room for staff |
| Accessibility | Built around your child | ADA compliance and access for a range of abilities |
| Installation time | One day | A weekend for small clinics, up to two weeks for large facilities |
We build both to the same commercial-grade standard. If you're planning for your family, start with our home sensory gym page. Clinics can see how we approach an occupational therapy gym and the rest of a pediatric clinic design, and schools can start with our guide to creating a sensory room at school.
Get a sensory room designed for your space
Every Fun Factory project starts with a free consultation. Send us a sketch or a few photos of your room and our designers will draft a layout with a 3D rendering, revising it as many times as you need until it's right, and we're glad to work directly with your child's occupational therapist along the way. Qualifying customers can finance with 0% interest for up to 12 months.
You can see how each stage works on our process page, or book a free consultation to get started.
Frequently asked questions
How much does it cost to build a sensory room?
The cost depends on the room's size, the equipment you choose and how complex the installation is, so every Fun Factory project is quoted after a free consultation. You can see how clinics think about the return on a gym on our sensory gym cost page.
How long does it take to build a sensory room?
A home sensory room can go from approved design to finished install in about a week. Manufacturing takes three days to a week, and the home installation itself is done in a single day. Small clinics are usually installed over a weekend so therapy isn't interrupted, and large commercial facilities can take up to two weeks.
Can I design a sensory room in a small space?
Yes. We've built sensory gyms in rooms as small as 8' x 10'. In a small room the layout matters even more, so it helps to use the vertical space for suspended equipment and tuck the retreat space into a corner.
What's the difference between a sensory room and a sensory gym?
A sensory gym is built for active play, with equipment like swings, climbing walls and crash pads that give strong movement and pressure input. A sensory room is often thought of as a calmer space focused on lighting, textures and retreat. Most of the rooms we design combine both, and our guide to what a sensory room is covers the differences in more depth.
Should an occupational therapist help design a sensory room?
If your child sees an OT, involving them gives you the best result. They know your child's sensory profile and goals, and we work directly with therapists during design and also offer equipment configurations based on common treatment plans.
Is a DIY sensory room safe?
Calming items like soft seating, lighting and textured mats are easy to add yourself. Anything a child swings from, climbs or hangs on is different, because it has to be anchored into the structure and rated for a moving child's force, and that equipment should be professionally engineered and installed.